Showing posts with label #blondesthatdiy. Show all posts

Saturday, October 04, 2014

How to Create a Patio with Stone Pavers - A Step-by-Step DIY

How to Create a Patio with Stone Pavers : A Step-by-Step DIY. Do you want to know how to create a beautiful patio with stone pavers that looks like a 5-star home and garden project? Well you have come to the right place to learn how easy it is! There is no need to mix and pour concrete.

How to Create a Patio with Stone Pavers
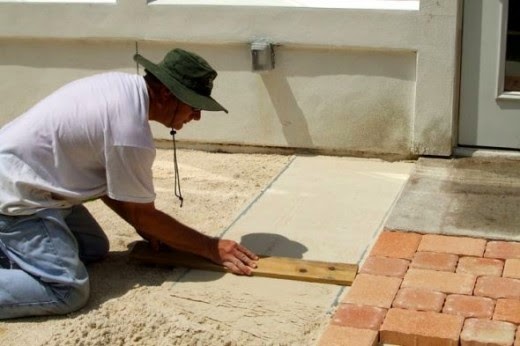
This is a do-it-yourself project that you can knock out in one weekend. See that picture? That is the ex-hubby, working with the actual materials we used! You can use this same DIY principle to create a walkway for your garden.

Make that patio larger or smaller; it is your do-it-yourself project. You decide how big or how small you want to make it as it is scalable up or down by following the pattern layout we have provided.

I have included pictures from our actual job showing you a before and after picture along with step-by-step instructions and pictures. You too can create a beautiful patio for your home and garden with this step-by-step how-to!

You know, I was so proud of my hubby [now the ex] because it was well-planned, very organized and quite timely from start to finish! You can do it. Start now on your very own do-it-yourself patio.

Photo Credit: Working on that DIY project by JaguarJulie w/the ex. 

Have You Ever Worked With Patio Stone Pavers?
Are you a DIY Handyman? What is your experience level?

Patio Stone Pavers poll results

  1. I'm a newbie!
  2. I have watched someone else.
  3. I am an expert!


jaguarjulie glamour shot in red dress
My Confession : I Was a Newbie
And, you too can learn how to create a beautiful stone paver patio!

 "I am so thrilled to bring you our patio paver project in an easy to follow format. You can do it too! Recently, I completed another patio stone paver project all by myself. One step at a time!"

Folks, fast forward. Today I am divorced from my industrious hubby who you can see working in that intro module. We did a nice job of creating that patio with the stone pavers. I am happy to report that I used my experience on that project and have created another smaller patio in my new home.

The challenging part can be getting all the materials to your home with a sports car. It helps if you have Home Depot or Lowe's deliver your materials. --The Brand Ambassador, JaguarJulie!

P.S. I was the Official Squidoo Backyard Gardener Contributor! Did you know that? Well, you probably guessed it. But, I bet you didn't know that I also am one of the Blondes that DIY! #blondesthatdiy

An Overview

  • Determine the layout for the patio area.
  • Determine the style of pavers you want to use and how many of each size you will need.
  • Tools you will need: flat edge shovel, Tamper, level, potato rake, wheel barrow or hand truck, two 5' x 3/4" steel pipe, 3-4' length of 2x4.
  • Materials you will need: Step one base gravel, step two leveling sand, pavers, paver edging and stakes.
  • Determine the pattern you will use with your pavers. You can go from a simple mix to elaborate patterns with different colors and sizes of the pavers.
  • Other important requirement is a good back. This project is somewhat physical but you can do it at your own pace.
  • You can get "how to" information from brochures at Home Depot and Lowes.

Before View of the Patio

Before View of the Patio
This is an actual before picture of our back patio area. We actually underwent a home renovation project to enclose our patio before we decided to create a back yard patio with stone pavers. This picture gives you a good perspective of the overall job.

Materials for Patio Paver Project DIY
Stone Pavers, Step 1 Paver Base and Step 2 Leveling Sand

Materials for Patio Paver Project DIY
 The pallet of materials for your patio stone pavers project.

A 100 Square Foot Patio Costs About $600.00 DIY graybox
A 100 Square Foot Patio Costs About $600.00 DIY

Materials List and Cost
Patio Stone Pavers and Step 1 Paver Base and Step 2 Leveling Sand

list and cost of materials for patio paver project

Home Depot delivered the pallet of materials needed for this 100 square foot patio project. Estimated cost of materials: $600.00 which includes a $79.00 delivery fee.

120 - 6" x 9" Concord Cobble 45mm orange/sand stone pavers
175 - 6" x 6" Concord Cobble 45mm orange/sand stone pavers
15 bags - Step 1 Paver Base
20 bags - Step 2 Leveling Sand

NOTE: Before this pallet of materials was delivered, we started the base with a separate load of 15 bags - Step 1 Paver Base. We brought those home in the back of our Nissan Murano -- and then opted to have the rest delivered.

Tools You Will Need
Flat Edge Shovel, Tamper, Level, Potato Rake,
Wheel Barrow or Hand Truck, two 5' x 3/4" Steel Pipes, 3-4' Length of 2x4

Establish a Pattern

establish a pattern for your stone pavers patio project
Determine the pattern you will use with your pavers. You can go from a simple mix to elaborate patterns with different colors and sizes of the pavers. This is a easy to duplicate pattern using a mix of 6" x 6" and 6" x 9" Concord Cobble 45mm orange/sand stone pavers. For our needs and budget, and since it was our first attempt at laying the pavers, we kept it on the simple side with using a mix of 6" x 6" and 6" x 9" bricks. With a little trial and error, we found a repeating pattern that worked out well for our layout.

Important Requirement A Good Back graybox
Other Important Requirement: A Good Back!
This project is somewhat physical, but you can do it at your own pace.
We found it rewarding with only one minor back outage.

Working with Step 1 Paver Base
Keep it Dry!

putting down step one sand base for patio paver project
Our little do-it-yourself patio stone paver project was only 8' x 13' which tied into an existing 3' x 4' concrete pad. The hardest part of the project, other than hauling around a bunch of heavy bags of dirt and stacks of bricks, is the initial grading of the ground to get the level and the slope to tie in to the surroundings. We had to work off of the concrete stoop to start and grade the slope down from the house. The best way would probably be to carefully put strings with level indicators, measuring the height from the ground to get the best consistency with the right slope. We did not have the patience for that and pretty much eyeballed it with spot measurements in the key places.

If you have grass to remove, we recommend using a total vegetation killer ahead of time. After the grass has died, dig out most of it and rake out the area to the approximate grade you want. Tamp down the dirt, smooth out the lumps and tamp some more.

Tamping Down the Step 1 Base Gravel

tamping down step one sand base for patio stone paver project
Pour in the base gravel and spread out to have at least a one inch layer. If your back is still intact, tamp away again. If the twinges start, take a break and a couple of your favorite pain killers and muscle relaxants and come back later.

Leveling the Step 2 Leveling Sand

leveling the step 2 leveling sand for patio stone pavers project
Once the step one gravel is tamped in place the fun can begin. Lay down the two lengths of pipe about 3' apart, working in a direction down grade. Pour down the leveling sand and screed back and forth with the 2x4 to get a smooth level fill between the pipes. Fill in the grooves left by the pipe. Sprinkle the sand in and lightly tamp in and smooth with your fingers. I found it best to screed a few side by side sections at a time, laying the bricks as you go. Once the sand is down you do not want to disturb it.

Duplicating the Pattern

duplicating the pattern for patio stone pavers project
It is relatively easy to duplicate your pattern with the patio stone pavers by referring to your pattern guide. Once the bricks are placed, you can walk on them to place the next section. This is the fun part because it goes relatively fast after the hours of the grunt preparation work.

Adding More of the Step 2 Leveling Sand

 adding more step 2 leveling sand for patio stone pavers project
Continue working in square sections. Repeat the process where you lay down the two lengths of pipe about 3' apart, working in a direction down grade. Pour down more of the leveling sand and screed back and forth with the 2x4 to get a smooth level fill between the pipes. Fill in the grooves left by the pipe. Sprinkle the sand in and lightly tamp in and smooth with your fingers.

Midway -- Leveling Step 2 Sand
And Continuing the Patio Stone Pavers Pattern

midway through how to create a patio with stone pavers
You are about midway through your project and starting to feel like a pro at working with the patio stone pavers!

Finishing the Placement of the Patio Stone Pavers

finishing the stone pattern placement for how to create a patio with stone pavers
If you have measured your patio accurately, you should find that you have enough of the stone pavers. Our project was almost perfect, as we needed 2 more of the 6" x 9" and 6 more of the 6" x 6" patio stone pavers. Ah, the end is in sight!

Preparing the Patio Stone Pavers for Edging

preparing the patio stone pavers project for edging
Once the bricks are all in place, you then put down the retaining edge.

Securing the Edging of the Patio Stone Pavers

securing the edging for the patio stone pavers project
Adding stakes to your edging will keep the bricks in place.

Adding the Remainder of the Step 2 Leveling Sand

adding remainder of step two leveling sand to patio stone pavers project
You have finished edging the patio. Next you will want to fill in the spaces between the pavers with the leveling sand. This works much better if the sand is good and dry. Sweep the sand into the cracks and finish by hosing off the excess.

Completing the Addition of the Remainder of the Step 2 Leveling Sand

completion of step two leveing sand to patio stone pavers project
The patio is finished! Stand back and enjoy the look of your new patio to get an idea of how you will want to landscape around the stone pavers.

Drumroll -- After View of the Patio

completion of how to create a patio with stone pavers project
Adding the finishing touches to the patio with sod and shrubs. We waited about one week before we put our outdoor gas grill and chairs on the patio stone pavers to ensure that the stones had settled. Now you are ready for entertaining!

Final Approval of the Patio Paver Project DIY
Receiving the Approval of the #1 Neighborhood Resident is Important! - Rocky the Raccoon has approved the patio stone pavers job!

rocky the raccoon approves the patio stone pavers project
We were finishing up the patio project when who should show up? It's Rocky the Raccoon who has been kind enough to actually pose for another lens in a photo caption contest.

how to tips patio paver project graybox
How To Tips to Create a Patio With Stone Pavers
You can get "how to" information from brochures at Home Depot and Lowes.
Some patio paver projects tips are also available on the internet.

Need More Patio Paver Ideas?

Get a copy of Pavers 101: Patios and Other Projects You Can Do. We all could use some inspiration with our DIY projects!

From a wonderful circular patio centered around a firepit, to a demonstration walkway that illustrates how to lay basketweave, running brick, and herringbone patterns, this book is the perfect resource for anyone who wants to undertake a great home improvement project.

Learn how to lay the groundwork, study details for edging and popular paver designs, and finish up like a pro. Clear photos detail every step in the process, and a gallery of more than 100 finished projects will inspire you to get to work. All you need is the muscle and a good back of course!

More Patio Stone Projects!

I moved to Leesburg, Florida in November 2015 as a single senior gal. I believe this original patio stone paver project with the ex-husband inspired me to try my own stone projects by myself. In February 2016, I designed and completed a golf cart path stone project down my side yard.

 Julie Ann Brady - Golf Cart Path Project in Leesburg Florida
Julie Ann Brady - Golf Cart Path Project in Leesburg Florida
In March 2019, I augmented the golf cart path project by using river pebbles for drainage along the outside edge and then ultimately replacing the red river rock with the river pebbles. I moved that river rock to my back yard. That was quite the job picking up and cleaning the river rock before moving it!!

I've also used eighty 16-inch patio stones to create a patio area in the side yard to the West of my house. That was a lot of manual labor getting the stones at HomeDepot and bringing them home to place them in the side yard. Girl Power!!

Since those stone projects, I've now created two walking paths through my front yard garden with twenty-six of the 16-inch patio stones.

Thanks for visiting!

Did you find this step-by-step project helpful and easy to follow? Do you have any questions about any of the steps on how to work with patio stone pavers? Have you actually done a job like this yourself? Would you be able to create your own patio? I'd love to hear from you. Please take a moment to drop me a line!

History: How to Create a Patio with Stone Pavers was originally created on Squidoo by JaguarJulie on July 13, 2009. On July 14, 2009 this lens earned the Squidoo Purple Star Award for quality content.

Sunday, September 21, 2014

Front Yard Accent Garden DIY

Do you have an unsightly area in your front yard? Have you considered doing a low-maintenance accent garden? Let me show you how relatively easy and inexpensive it can be. Add some curb appeal and value to your home! I should know as I have been doing it yourself - or should I say MYSELF - for the 3.5 years I have lived in my house. I am one of the blondes that DIY; you know?

front yard accent garden diy completed
Front Yard Accent Garden DIY - Complete
Photo Taken : August 4, 2014
There is a photo of the front yard accent garden upon completion on August 4, 2014. From that view, it doesn't look like that large of an area. It is a bit of an optical illusion. We'll show you some other views so that you get a good idea of the space we used for this DIY accent garden.

BEFORE PHOTO - WHY DIY?

front yard accent garden area before photo

What is particularly interesting about that area of the yard? Behind the neighbor's fence is a vegetable garden. For the most part of the year, it is a barren ground that drains and leeches into my side yard and my front yard, as you can see in that last photo!

This year, I was further challenged when the neighbor in the pink house next to them came over one night with his pressure washer. He washed their fence for them. Not sure whose idea it was to pressure wash the fence; probably not my next door neighbors! The next morning when I came out to check my front yard, I found a mushy wet area where the grass was already being challenged. In a few days, the grass was no longer green! Thanks to my neighbor(s)' actions! Wow! How about all that dead grass? I had already put down sod once. I wasn't going to try sod again.

PUTTING DOWN SOD - AUGUST 2012

front yard accent garden plot area with sod

In August-September 2012, I put down sod in that very area! When I moved into my home in June 2011, the next door neighbor was waving his arms at me that I needed to water that area of the yard. "Yeah, Yeah! I am just moving in ... I'll take care of it." Hey, you know water isn't free???

I had previously dealt with the same type of grass issues in my side yard next to the neighbor's fence. You might have seen my side yard project with my mexican petunia garden. So, I was up to doing another accent garden out of necessity!

PREPARING THE PLOT

front yard accent garden dug plot

It is important when you are doing any digging in your yard, to know where the cable and any other utility lines are placed. When I had my privacy fence installed, they had contacted the company that comes out and marks the location. However, my fence installer did take out my AT&T cable! So, I know where it has been relocated in my yard -- at the very bottom of the photo!

Digging up that area of the yard wasn't too difficult since the grass had been challenged. I think I might have filled 4-5 black yard bags with the dead grass pieces. I've dug up a lot of yard for my gardens, so I don't mind this activity. I always were my Playtex Handsaver Gloves! Oh boy, but I have gone through a lot of gloves in the past 3.5 years! Every kind you can think of too. It seemed even the heavy duty gloves didn't always protect my acrylic nails. So, I ended up relying on the Playtex Handsaver Gloves.

I found a handy technique for clearing the plot. After I would use my shovel to dig into a rectangular patch of grass, I'd sit down on the inverted blue plastic bucket. Then, wearing my rubber gloves, I'd separate the dead grass [and some weeds] from the soil. When I'd fill a black yard bag, I'd move that to the other side yard behind the fence until yard waste pickup day.

MATERIALS LIST FOR DIY

front yard accent garden diy materials list and cost

My materials list for this do-it-yourself project included:

  • One - 1.5 CF tree and shrub soil @ $7.67
  • One - Fulton 15.6" red square patio stone @ $3.99
  • Twenty-two - Fulton 15.6" red scalloped edging @ $1.78 = $39.16
  • Five - 1.25 qt Liriope Aztec grass @ $1.89 = $9.45
  • Two - 2 gal. Bottlebrush plants @ $10.98 = $21.96
  • Five - 2 CF Preen russet red mulch @ $4.49 = $22.45
The total cost of materials, with tax, was $112.01. The total time spent on this DIY project was under 6 hours. I figured I spent about 2 hours preparing the plot; less than 2 hours back and forth to Lowe's to pick up the materials; and less than 2 hours to install the DIY garden.

If you were to contract to have this DIY project installed, I estimate it would cost 2x the materials list = $225.00 plus 6 x $50/hour manual labor for a total of $525.00.

I LOVE BOTTLEBRUSH PLANTS

Selecting the plants was a no-brainer for me since I already had two Bottlebrush plants in front of the privacy fence gate. I've also got the Liriope Aztec grass also in my other side yard on the left side of the house; it makes a nice accent!

In my DeerCreek Country Club home, we had a Bottlebrush plant at the front entrance. My now ex-hubby let me prune that plant a couple of times. Ouch!! I do believe he might have finally moved it to the back yard.

I actually found that you can buy the plant, Bottlebrush Tree Plant Red Cluster Callistemon Rigidus Starter Size through Amazon! It was because of the red flowering pinecone-like clusters that I selected this plant for my front yard. I have a red front door along with Holland red and gray brick. Plus, the plant complements the patio stone and scalloped edgers.

THE LAYOUT

To get an idea on the measurement of that triangular garden, there are ten 15.6 inch red scalloped edging stone down the property borderline. That's 156 inches of stone across a distance of some 163 inches. At the bottom left of the layout, there are seven 15.6 inch edgers in the 110 inches. You can see that there is a 36 inch open area for access to the privacy fence [for mowing the back yard]. I placed the one Fulton 15.6" red square patio stone there as a stepping stone to the four such stones directly behind it. On the top left of the area, are two of the 15.6 edgers.

AFTER PHOTO

front yard accent garden diy completed
Front Yard Accent Garden DIY - Complete
Photo Taken : August 4, 2014

I SHOULD WRITE A BOOK!

That's what my mom keeps telling me. I've not officially written a book, but I have written lots of blog posts and other online content. I've not yet charged anything for my DIY tips. I'd love to hear if I have inspired you to try your own DIY project.

So, here is another resourceful gal's gardening tips. In Easy Front Yard Gardening: Basics of Front Yard Garden Design, the author, Shirley Dianne Lise, delivers her self-help guidebook.

Get over 85 pages of instructions to design and complete your very own front yard garden. The bottom line is curb appeal!

I designed my front yard accent garden in such a manner that I could carry it down the property line to the curb. I've not gotten to that point yet, but it is a consideration. The other benefit, aside from the curb appeal, is the low maintenance.

How does your garden grow? My bottlebrush plants are starting to flourish! And the Aztec grass is looking pretty good too.

Wednesday, September 03, 2014

Blondes that DIY Blog

In case you haven't heard, I started a new blog on May 9, 2014. It's my Blondes that DIY blog! That is actually my fourth Google blog. You know, it wasn't until August 19th that I started to engage on my new blog to do my second post. I started out with a cup of coffee, so to speak, prepared on my Bella One Scoop One Cup Coffee Maker!

jaguarjulie Blondes that DIY blog
Blondes that DIY blog

As of August 30th, I have published some 118 blog posts. The last article is about probably the largest scale do it yourself project I have taken to date! Using a Corona 18 inch razor tooth hand saw, I spent 14 consecutive weeks sawing the up to 50 foot limbs on the 9 crepe myrtle trees that line the back of my property. Boy oh boy, was that ever one heck of a DIY project!!

Squidoo Burp : Nothing to see here
Squidoo Burp : Nothing to see here!

For me, it is a transitional time. I was a lensmaster on Squidoo for 8.5 years! Wow, pinch me. I can't believe it is over. I am sitting here at my desk gazing out at those trimmed crepe myrtle trees and wondering, "when will my Squidoo lenses transfer to HubPages?" I've set up a new profile there, Julie Ann Brady on HubPages, and am waiting for my 100 lenses to transfer as hubs. Right now, there is "nothing to see here ... yet" on HP!

UPDATE: Well, on September 4, 2014, my 100 lenses transferred over to HubPages as hubs. Because I was busy the first day removing a few, the accolades only recorded 50 lenses published and featured. Within a little over the first week, I had the 10,000 views accolade appearing on my profile. Fast forward to October 3rd at 6:30pm. I removed my final hubs that remained there and repurposed those to my JaguarJulie Blog! Right after I deleted the last one, HubPages took back several accolades that they had awarded - 50 hubs published, 50 hubs featured, 10,000 views! Squidoo never did that. Gosh, HP is rather like an indian giver or something. Taking back something that you earned through your hard work!!

I Love Blogging!

I have been a Google Blogger since December 2004. Wow, can you believe that? Ten years. What is the anniversary gift for ten years? I sure hope Google continues their blogging platform a little longer.

Do It Yourself!

Opting to add more content to my blogs, you can say I am embracing the concept of "do it yourself." I hope you enjoy my new blog and take a moment to say "Hello!" Now that things are winding down and then back up for a lot of peeps, I hope our friendships continue onward as we reach this fork in the road. And, I look forward to also forging new friendships.

Be Authentic!

I guess I need to say this again; i.e., be authentic, be original, be YOU. Don't try to be somebody else or take somebody else's copyrighted images and content to use. Content scraping is not a noble profession.

Sunday, October 12, 2008

DIY becoming more complicated

Feather River Fiberglass Door from Home DepotHmmm, ever notice that DIY is becoming more complicated these days? Yep, the next time you decide to tackle a so-called do-it-yourself [DIY] project around the house, you better have the yellow pages handy! We didn't need to resort to the yellow pages, but we did know better to call a friend of ours, Roy, who is a handyman of sorts freelancing since he retired from his normal programming job.

We have been debating for more than a few months about replacing our beat up front door. After shopping Home Depot online, we identified a few possible fiberglass doors that would work for our 36" x 80" wooden door. Before committing to that Home Depot door, we consulted with our next door neighbor Joe who happily offered to help us get a door through his construction company. When Joe came back with the initial figures, we opted for a so-called cheap fix with the Home Depot door.

On September 27th, we picked up the door and brought it home. It was too heavy for me to lift with hubby, so we engaged Joe's son to help put it in the garage. It wasn't until Saturday, October 11th, that Roy was able to schedule time in his busy schedule to help with the install. The idea was that we would take the new door out of the frame and simply swap out the hinges and install it where the old door was.

Well, that was until we got to the final step after measuring to confirm the hinge placements. Those were supposedly spot-on. But the other side of the door wasn't lining up. It looked like we would need to fill the holes where the deadlock was placed. Next thing I know, hubby is in my office reaching for my tape gun. "What are you doing?" I asked. "The door isn't going to fit." he says. "What?"

The Feather River fiberglass door is NOT a 36" x 80" door after all! It actually is more like 36" x 79-1/4". If you want to have that door, you will need to totally 'tear apart' your front door frame to put it in ... in the frame that it comes in! It will not work in the existing door frame.

Hmmm, I do recall the young man in Home Depot telling us that it is RARE, extremely rare, that a door, any door, will fit exactly. Now why is that I want to know? Isn't a front door standard? Shouldn't a front door be standard? Well, I guess after all, size does matter! Must have been a man who designed those doors. After all, 79-1/4" is 80".

By the way! You might have heard that I am one of the blondes that DIY. Oh, I have been doing it yourself, or myself, for so many years.